This is the first post in my new series "Beginners Guide" in which i will explain key areas in makeup application in simple, easy to understand steps allowing for flawless application and an understanding of the products and steps to achieve each look. This week I will be focusing on foundation, choosing the right product, shade and application. Enjoy!
Foundation, to me, can either make or break a makeup look. But it can be difficult to know what product to use, what shade you are, how to apply it, what formula is best, so its understandable that its so confusing!
I believe that when it comes to choosing and creating the perfect base, you should follow 3 steps/guidelines.
1. Choosing the formula
There are hundreds of different kinds of foundation out there, luminous, matte, full coverage, light coverage, powder, liquid, the list goes on! I know it can be very daunting walking up to a makeup counter and seeing rows and rows of different foundations in hundreds of shades and not knowing where to start. This is my advice; (disclaimer: These are only my opinions, if you find other methods work better for you then by all means stick to them!)
- Start with your skin type - If you have fairly oily skin, a more mattifying foundation may be best. If you have fairly dry skin a matte foundation may emphasise flaky areas and may dry out your skin further, so to fake dewy skin, a more moisturising luminous formula could work better, for example; Nars Luminous Weightless foundation gives a great lightweight glow to the skin giving you a lovely, dewy look.
Foundation coverage is definitely personal preference. I like a medium coverage foundation to hide blemishes and even out my skin tone but not look overly fake. I've found that 'Rimmels 24 hour coverage foundation with comfort serum' is my favourite for faking flawless skin that still looks like skin. M.A.C cosmetics foundations are famous for offering full flawless coverage if that what you prefer. My ultimate all time favourite foundation for camera ready skin is Nars's Sheer Glow Foundation. It looks like photoshop in a bottle and looks radiant without looking shiny.
2. Choose the Shade

The shade of your foundation is crucial in creating a seamless look, after all, the purpose of foundation is to look like your skin, just better. There is no point wearing a foundation 4 shades too dark because it will only emphasise imperfections and show that you are wearing foundation! There are many tricks to choosing the right shade, I've found the best is to try a couple colours on your jaw line/cheek area and blend them up the cheek and down the jaw line slightly to see which one best marries with your skin colour. My biggest piece of advice is to go outside and see which one looks best before buying because often in department stores the lighting is not natural and what may look fantastic in store could look completely wrong in natural day light. I also recommend if you can, trying on the foundation (many makeup counters will apply it for you) and wait an hour or so and see how the product settles in your skin, some products set a different colour and look very different after a few hours wear. Especially if you are buying a high end foundation thats expensive, you want to know it will continue to look good throughout the day. Whilst some people like to match their foundation with the colour of their fake tan, the safest bet for having a natural looking foundation is to match it with the colour of your natural skin tone.
M.A.C do a great job with foundation matching because they have 2 different undertones - Warm and Cool. For example, some of their colours are labeled NC20 or NW20 - the C standing for a cool undertone, the W standing for warm undertone. Cool tones are usually more olive, yellow based, whilst Warm tones are usually more peach/pink based. Again, swatching the foundation in natural day light is the best way to determine which colour works best.
Check out this clever post where you can determine your skin tone based on the colour of your veins.
3. Application


Often the best foundation can be ruined with streaky uneven application. I tend to apply the foundation with a flat brush to get a light even layer on the skin, primarily focusing on the inside area of your face. I start at my nose and apply it outwards across my cheeks and upwards up my forehead. Starting in the centre of your face and working outwards ensures you don't get too much product on your jaw/hair lines creating unnatural foundation lines. I then go in with a duo finer thick stippling brush (Im using one by Zoeva) and light blending and patting motions to blend the foundation around the face and into the skin creating an even, airbrushed look. Ive found this kind of brush is best to ensure foundation is evenly blended and there are no streaks which can often occur with flat foundation brushes.
Additions


Once you've finished you're foundation you can add more tricks and other products. This would be when you apply a cream or powder contour. For my every day face I conceal and highlight under my eyes using a light under eye concealer a few shades lighter than my skin tone. By placing it in a triangle shape you brighten that area of your face as well as covering under eye circles. I personally don't use a brush to blend this out as the warmth of your fingers really melt the product so it blends seamlessly into the skin. Use your ring finger to do this as it applies the least pressure and be sure not to pull or drag the skin as this can damage it and create lines. I then set the entire look with a light powder (can be translucent or coloured) lightly patting it over my face with a large fluffy brush. This just ensures the foundation is set and lasts all day. If you are using a powder foundation you can skip this step. From here you can bronze, contour, blush, highlight etc. but you have a perfect flawless base to work with and develop using other products!
I hope this helped you, let me know what other tutorials, tips, tricks or reviews you would like to see in the comment section below.
Anya xx
 This makeup look has been a timeless staple in the makeup industry for decades, and you can see why, its clean, its classic, and it has the ability to be edited to match arising trends - smoking out the line for an edgy look, using a bold colour like cobalt blue for a modern edge; the possibilities are endless. Once you learn how to perfect this look, you can experiment with new approaches and different effects.
 Application: Every one has their own way of applying liquid eye liner but this is the way that works best for me. First of all, hold the pen the same way you would hold a normal pen and anchor your hand with your pinkie by resting it on your cheek.
 Start in the centre of your eye and draw a thin line to the outside of the eye. Then go to the inner corner and draw a line that connects to the centre of the eye. Then draw a small line from the outer corner out to form the flick, start off with a small line and you can make it bigger if you want - to find the line that works best, use a pencil or piece of paper and follow the ankle at which your bottom lash line curves up and meets with your eyebrow.
  If you are trying it for the first time, place a piece of sticky tape in the same place - not only will this keep the line straight, but also remove any mistakes that go onto the sticky tape (Tip: this is also great for making a smokey eye where you want a clean sharp edge. Just make sure the angle and line of the sticky tape is the same on each eye - you don't want your liner going up at 2 different angles!)
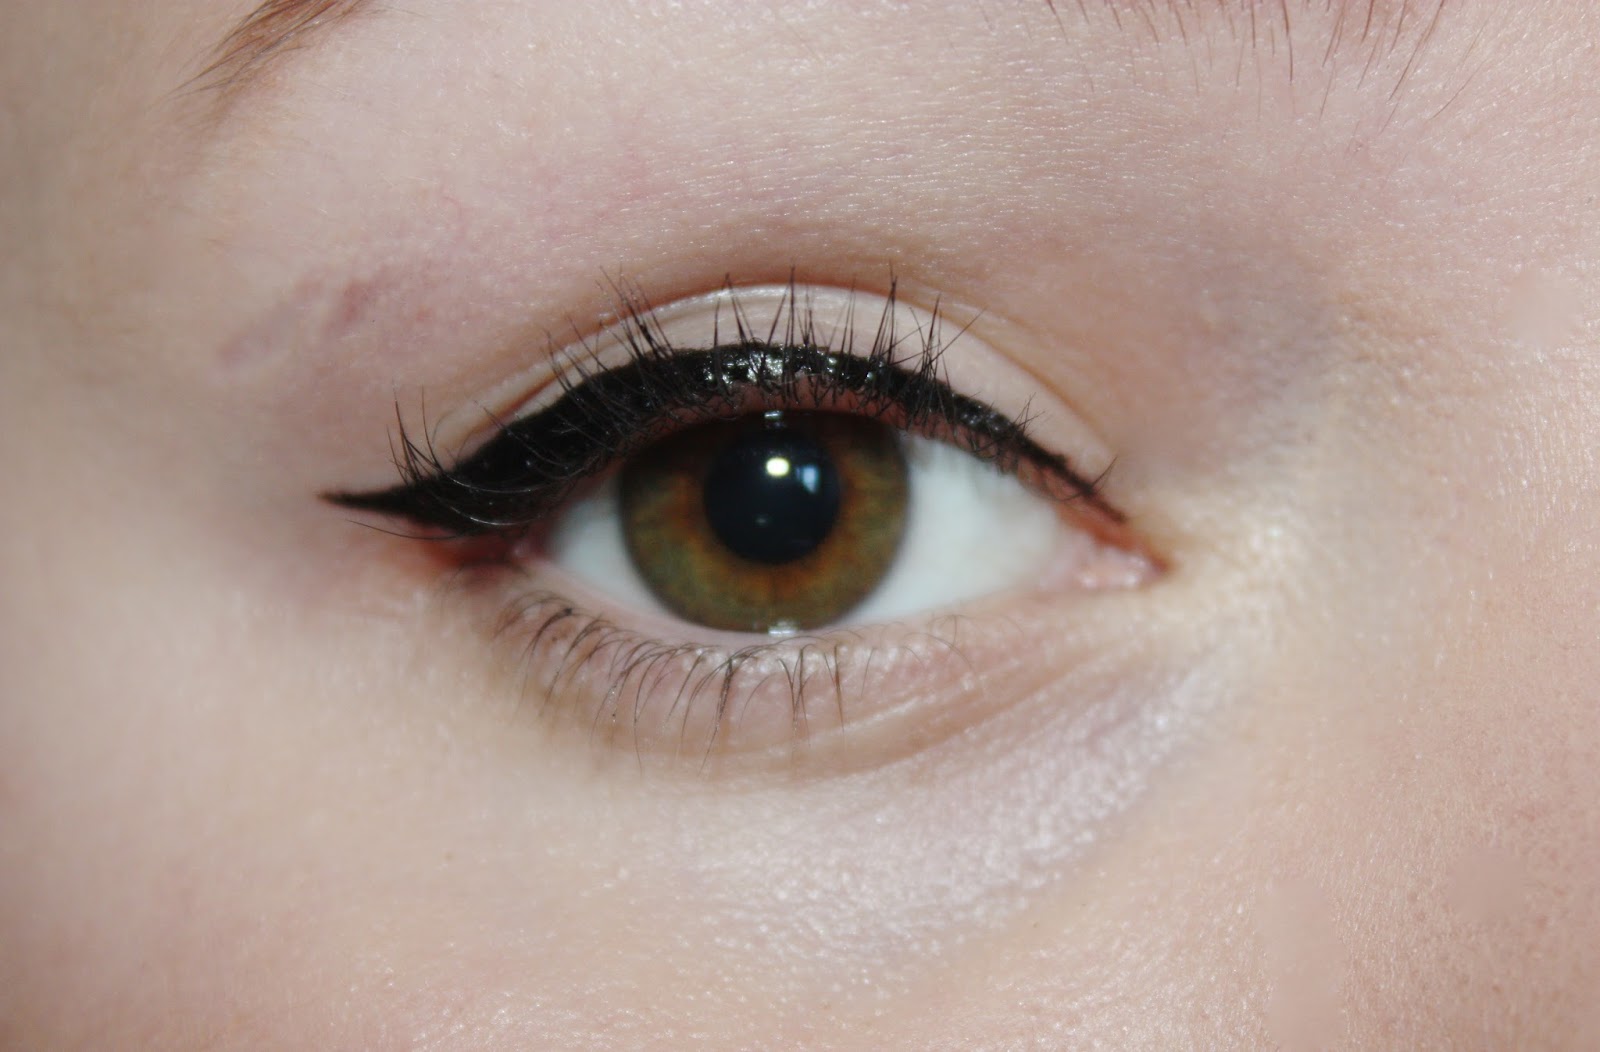 Then go from the edge of the little flick you made and connect it to the line you made on the lash line, this creates the thicker flick of the wing. Note: Start off with a small flick on each eye and you can make it bigger if you'd like - Its far easier to make the flick bigger but a lot harder to make it smaller!


